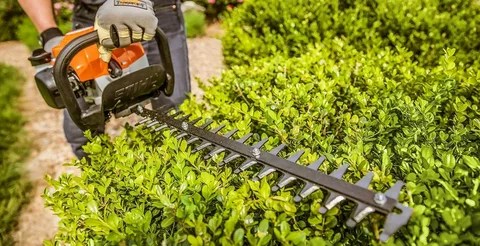
When it comes to maintaining a tidy and well-manicured yard, hedge trimmers are essential tools. However, just like any piece of equipment, they require regular care to perform efficiently and safely. In this guide, we’ll walk you through the basics of Hedge Trimmers Maintenance 101: Keep Your Tool Sharp and Safe—ensuring your trimmer remains in peak condition all season long.
Why Maintenance Matters
Neglecting your hedge trimmer can lead to dull blades, poor performance, and even dangerous malfunctions. Regular maintenance not only extends the life of the tool but also helps you work more efficiently and safely. Whether you’re a seasoned gardener or a weekend DIYer, understanding the importance of upkeep is key.
Step 1: Clean Your Hedge Trimmer After Each Use
One of the simplest yet most important steps in hedge trimmer maintenance is cleaning. Sap, dirt, and debris can accumulate on the blades and motor housing.
How to Clean:
- Use a stiff brush to remove loose debris.
- Wipe the blades with a cloth dampened in soapy water.
- For stubborn sap, use a resin solvent or mineral spirits.
- Dry the blades thoroughly to prevent rust.
Step 2: Sharpen the Blades Regularly
Sharp blades make cleaner cuts, reduce strain on the motor, and ensure your plants stay healthy.
Sharpening Tips:
- Use a flat file or sharpening stone to follow the existing angle of the blade.
- Make consistent strokes and avoid removing too much metal.
- Always wear gloves and eye protection during this process.
As emphasized in Hedge Trimmers Maintenance 101: Keep Your Tool Sharp and Safe, sharpening is a key part of your regular routine—don’t skip it!
Step 3: Lubricate Moving Parts
Friction can wear down parts and reduce efficiency. Lubricating the blades and joints minimizes wear and keeps everything moving smoothly.
Best Practices:
- Apply a light machine oil or trimmer-specific lubricant.
- Focus on the blade edges and any visible pivot points.
- Wipe off excess oil to prevent dirt buildup.
Step 4: Inspect and Tighten Screws
Vibrations during use can loosen screws and bolts over time, potentially leading to mechanical failure.
Checklist:
- Check blade screws, handles, and casing after every few uses.
- Use the appropriate screwdriver or wrench to tighten them.
- Replace any worn or stripped fasteners.
Step 5: Store Properly
When not in use, proper storage is essential for keeping your hedge trimmer safe from moisture, dust, and accidental damage.
Storage Tips:
- Hang it on a wall or store it in a dry toolbox.
- Use a blade cover if available.
- Never leave it on the ground where it could get wet or knocked over.
Final Thoughts
By following the principles in Hedge Trimmers Maintenance 101: Keep Your Tool Sharp and Safe, you’ll ensure that your trimmer stays efficient, effective, and safe to use. Routine cleaning, sharpening, lubrication, and inspection can go a long way in preserving your investment.
Take the time to care for your hedge trimmer, and it will reward you with years of reliable service—keeping your hedges (and your fingers) in great shape! Whether you’re a casual gardener or a landscaping pro, these tips are your go-to guide for a well-maintained tool.

